[social_warfare]
You can create your website's backup on a Remote server(i.e you can take backup of your website on other server) using wpCentral's Remote Backup feature following the guide here.
Add a Remote Backup Location
1. Login to your wpCentral panel here using your registered username and password.
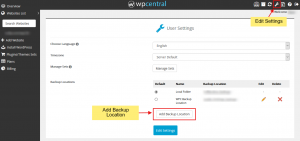
2. Go to Edit Settings page by clicking on the Edit Settings icon on top right side of the wpCentral panel and click on Add Backup Location as shown below:
3. Fill in the details of your remote server where you want to create the backup and then click on Add Backup Location to save the details.
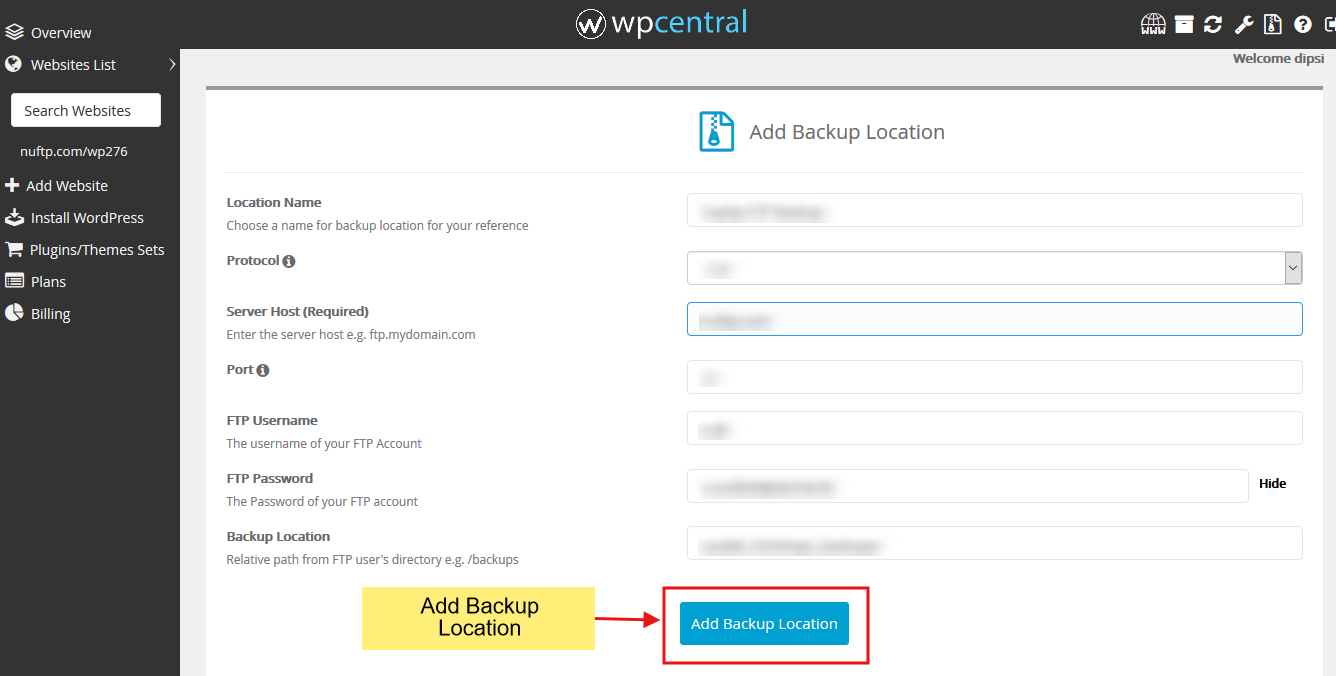
Fields are explained here:
Location Name: Choose a name for the Backup Location for your reference.
Server Host: Enter the server host (e.g. ftp.mydomain.com) where you want to store your backups.
Protocol: Select the protocol by which Softaculous will communicate with the remote server. Default is ‘FTP’.
Port: Enter the Port to connect. Default FTP port is 21.
FTP Username: The username of your FTP Account.
FTP Password: The Password of your FTP account.
Backup Location: Relative path from FTP user’s directory where you want to store your backups e.g. /backups.
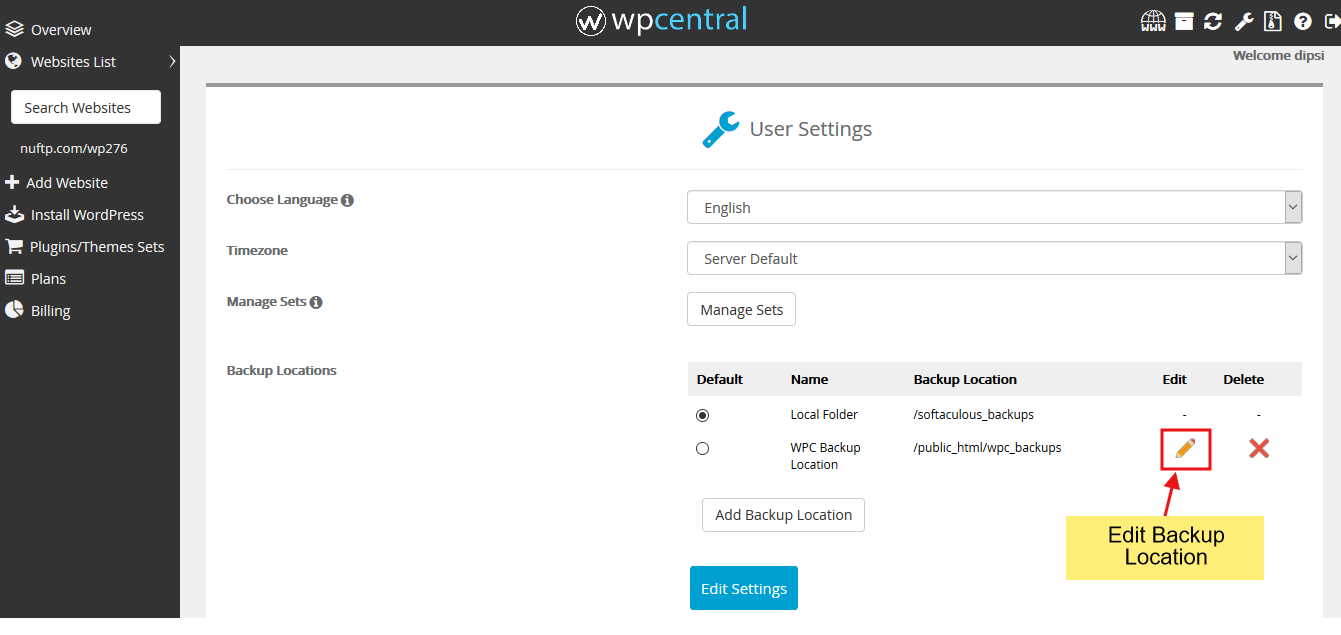
4. Your Backup Location is successfully saved. You can see the list on Settings Page.
Edit a Remote Backup Location
1. Go to wpCentral Panel -> Edit Settings -> Click on Edit icon provided besides the backup location in the list.
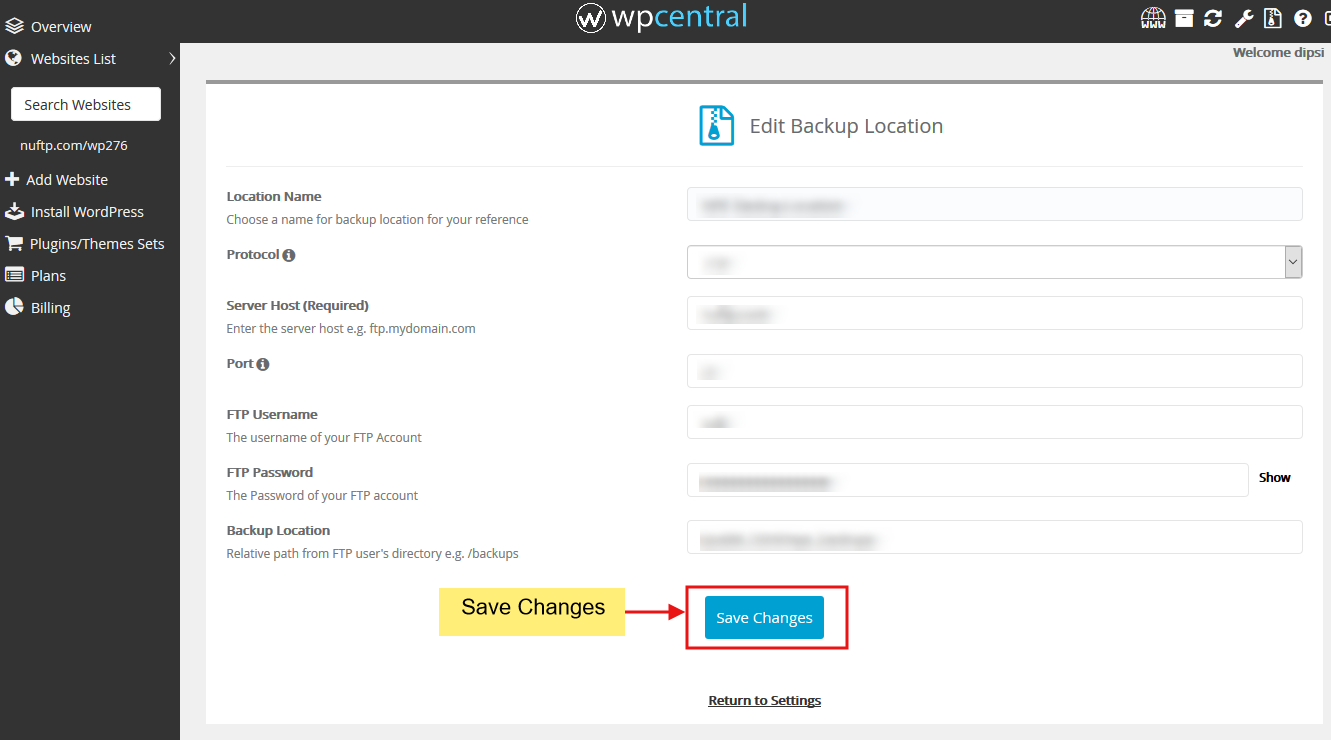
2. Edit the details that you want to change and then click on Save Changes to save the changes you made.
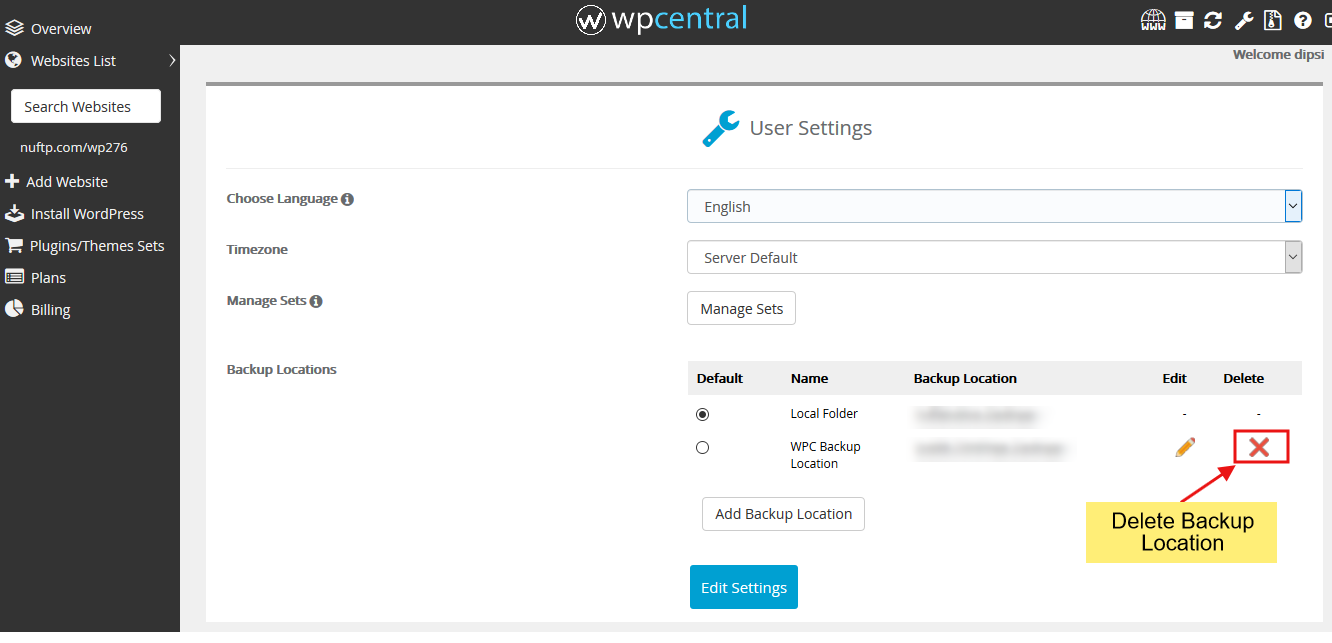
Delete a Remote Backup Location
Go to wpCentral Panel -> Edit Settings -> Click on Delete icon provided besides the backup location in the list.
Once the backup location is deleted, the website(s) for which the backup location was assigned will be reassigned with Default Backup Location selected. If the default Backup Location is deleted as well, the backups will be stored by default on the Local Server.
Set Default Backup Location
Go to the wpCentral panel -> Edit Settings -> Select the Backup Location you want to set as Default Backup Location (click on the Radio Button) -> Save the settings by clicking on Edit Settings.
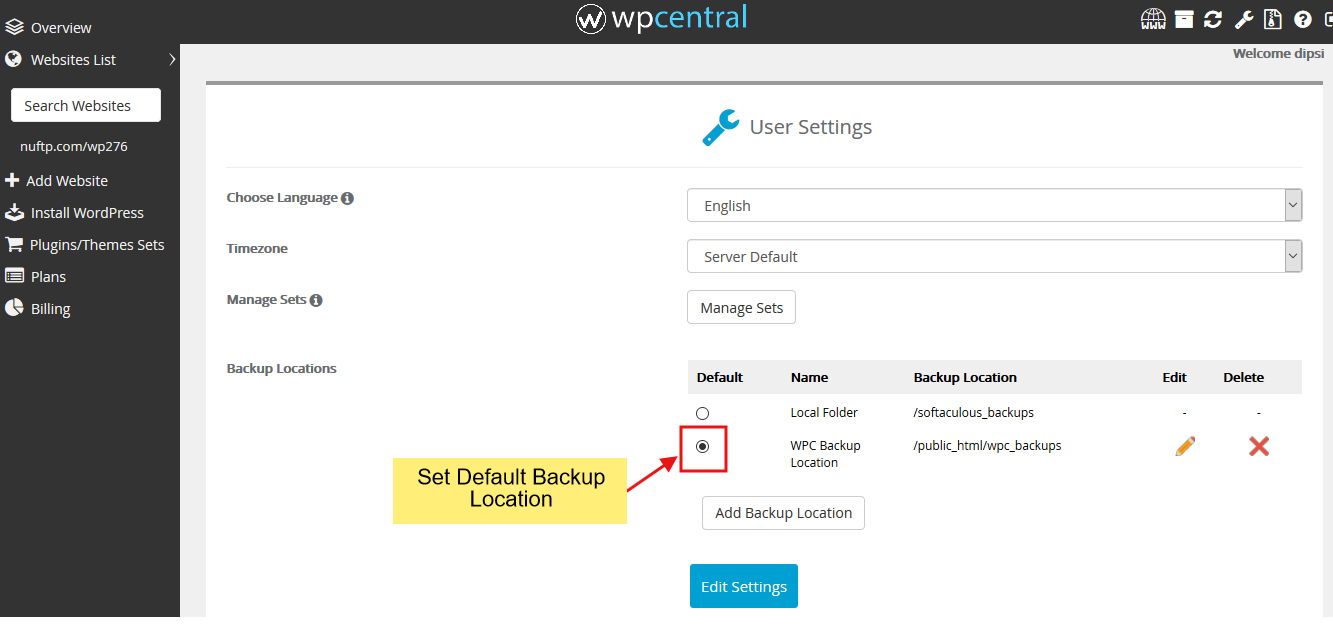
Significance of setting a Default Backup Location is that even if no backup location is set for a website, the backups will be stored at this default backup location.
Set a Backup Location During WordPress Installation
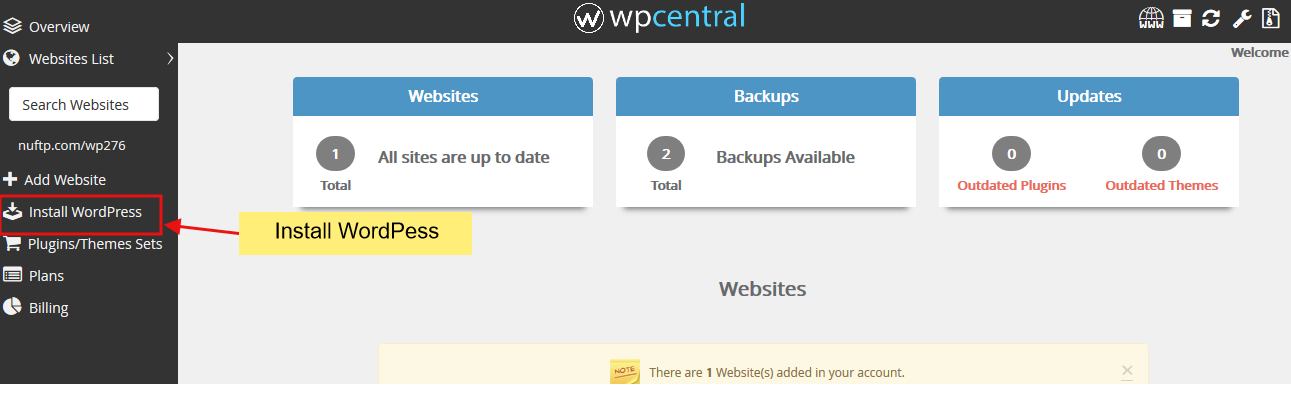
1. Go to wpCentral Panel -> Select Install WordPress option from the left vertical navigation menu.
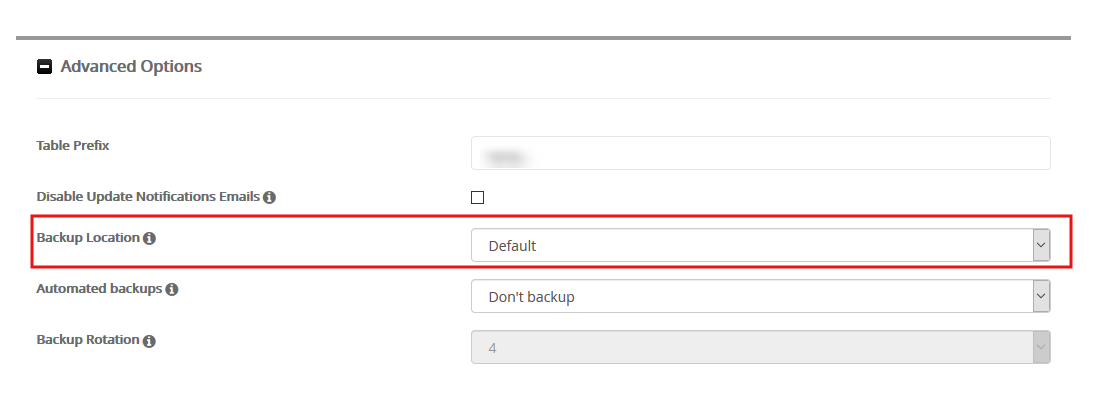
2. Install form will be displayed. To select the Backup Location, go to Advanced Options section of the install form. Select the backup location where you want to store the backup of your installation.
Once you are done with the details click on the install button. Now you can take a backup of this installation from Create Backup page. Your backups will be stored at the Backup Location you have set.
Set a Backup Location for an Existing Website
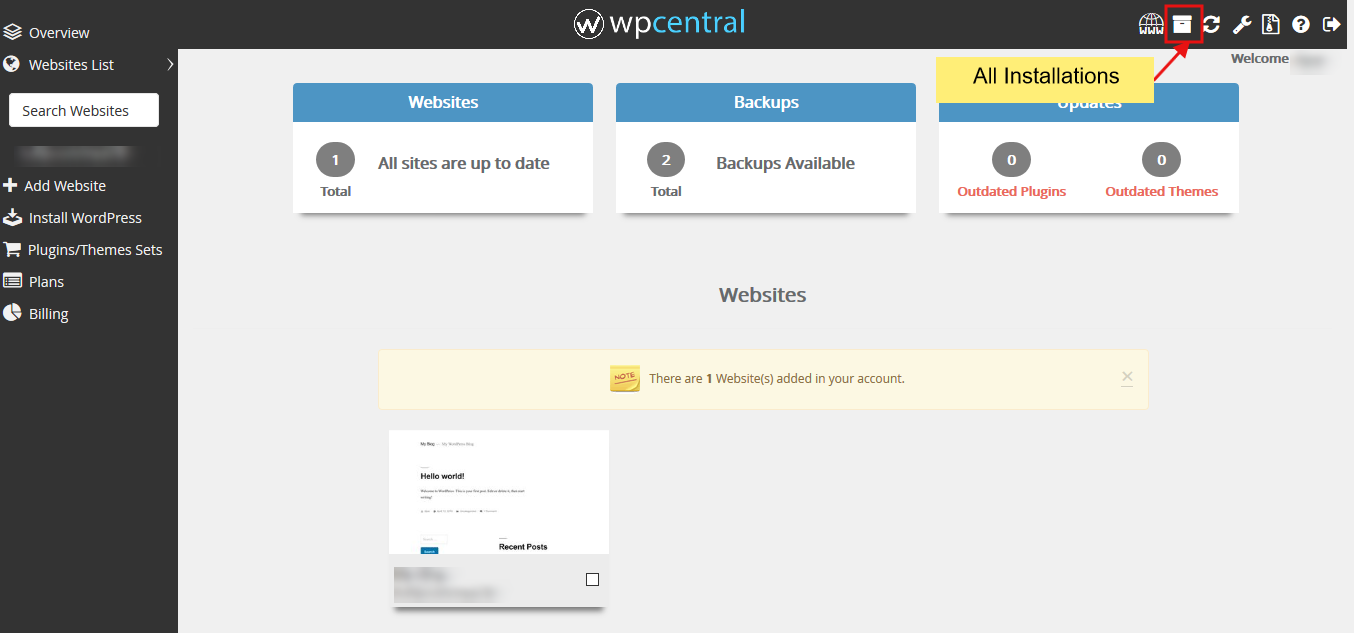
1. Go to wpCentral Panel -> All Installations page as shown.
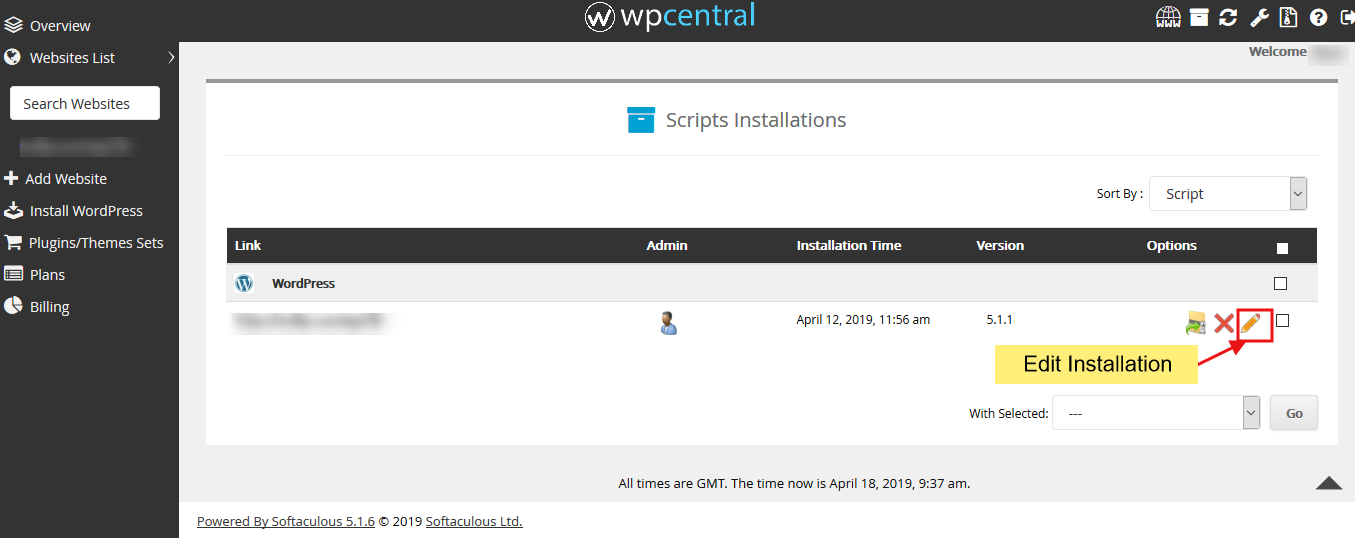
2. Click on the Edit icon besides the website you want to set the backup location for.
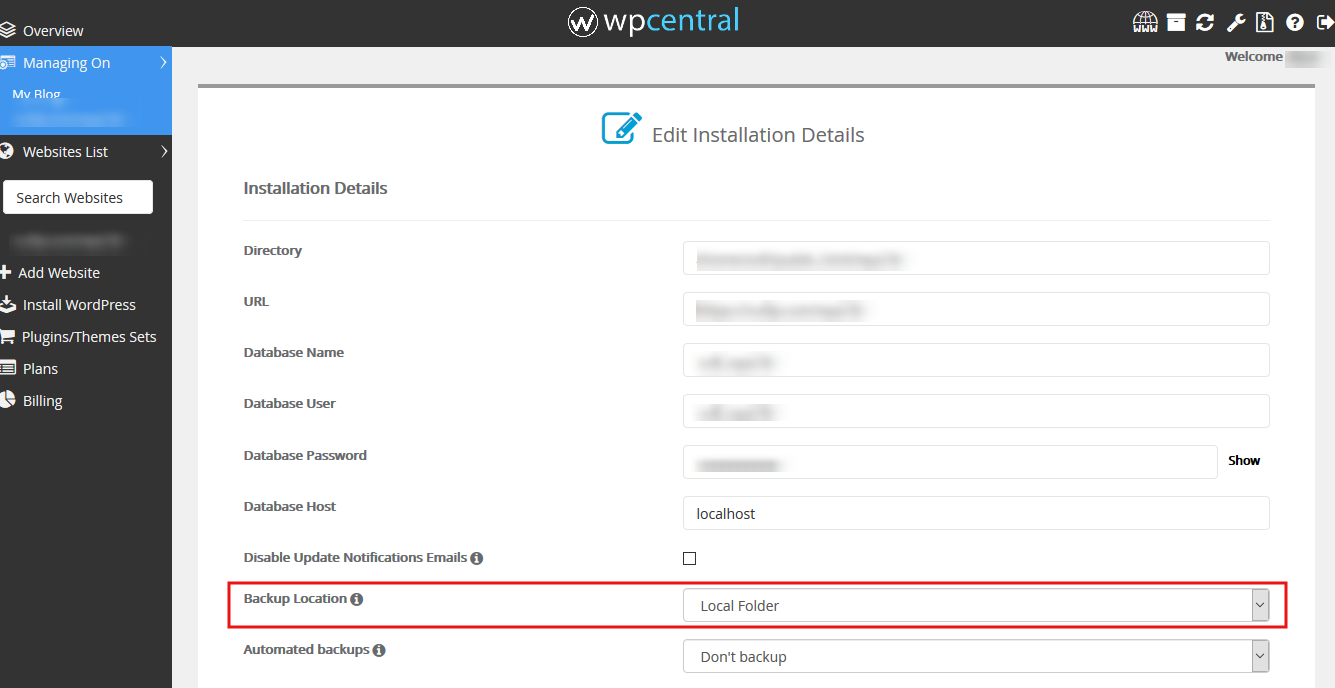
3. After clicking on the Edit Icon you will be redirected to the page where you can edit the installation details.
4. Edit the Backup Location by selecting the one you want from the drop-down.
5. Now click on the Save Installation button to save the edited installation details. Now the backup of this installation will be stored at the Backup Location selected.